How To Move A Mattress By Yourself

If you’re reading this article, you likely have found yourself on the wrong end of moving a mattress. This task can be one of the most difficult when moving house. Mattresses are heavy, awkward, and bulky.

The generally accepted practice is to call up some friends, offer them pizza, then struggle to move the mattress together as you desperately wish for an easier way.

Today is your lucky day! Moving a mattress doesn’t have to be such a struggle. There is a method to this madness. If you want to know how to make the whole process easier, read on.

Pick a Proper Transport Vehicle to Move Your Mattress

It may be tempting to suppose that you can stick your mattress inside your car. However, this is bound to fail. Most mattresses will not fit in a car trunk of any size. However, there are vehicles that are great for transporting mattresses.

A pickup truck is an excellent choice. Most mattresses will fit on the truck’s bed easily. If you don’t have a pickup truck, you might have to ask around to friends or family. If you still can’t access a truck, you may have to rent one.

A van will work well. If you have a van and can remove the seats, you can easily slide a small mattress inside without much trouble. SUV’s can also be used for mattress transport. Use rope or straps and properly secure the mattress to the roof.

Materials to Move a Mattress

Now that you’ve figured out your transport, it’s time to gather the tools to help you transport the mattress safely. In fact, most of these are tools you should have for any DIY move without professional assistance.

  • Thick plastic and properly-sized mattress bag. This bag will keep your mattress clean and rip-free.
  • Rope to properly securing your mattress if you’re putting it on the roof of your vehicle
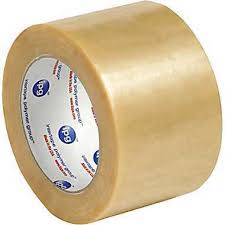
  • Duct tape
  • Scissors
  • Work gloves
  • A trusted friend. You’ll need an extra set of hands.

Securing Your Mattress

Securing your mattress properly to the roof of your car is super important. Failing to do so can lead to mattress damage, as well as possibly causing an accident on the highway.

Protecting a Mattress to Move

The first step in securing the mattress is to wrap it in plastic or tuck it into a properly-sized mattress bag. Any extra plastic should be securely taped down. Wind can rip unsecured plastic, or create a sail which will pull the mattress off the roof and may cause an accident.

Rope to Move a Mattress

The kind of rope you buy to secure your mattress is important. It should be a sturdy rope, but one that isn’t too hard to tie. Make sure you have enough rope to go across the length of your mattress, and another piece long enough to secure across the middle.

The amount of rope you’ll need will vary. However, there are some rules of thumb you can follow.

  • Mattresses are 74-84 inches long. This is up to seven feet. You’ll also need several additional feet of rope at each end. So the rope that goes along the length of your mattress should be somewhere around fourteen feet long.
  • For the rope that goes across the width of your mattress, measure your bed. Then multiply that number by four. That should give you enough rope.

Secure the Mattress to the Car

Now that you have the proper rope and your mattress is safely wrapped in plastic, it’s time to secure it to the car. Place the mattress on the roof. Make sure it is in the middle.

Toss the first piece of rope over the length of your mattress. There should be enough rope left to tie securely under the front and back of your car. Make sure the rope is taut and the knots are secure.

When that’s done, open all your windows except the driver’s window. Toss the second piece of rope across the mattress’s width. Then loop it back through the open windows twice before tying the rope ends together inside the car.

It is very important that you leave the driver’s door free as you won’t be able to open any of the other doors when the rope is tied. You want a way to get into and out of your car in case of an emergency or when you reach your destination.

Mattress Moving Safety

Carrying a mattress on your roof is considered a wide load. It will block part of your view. Remember to drive slowly. If possible, take back roads and avoid freeways.

If you have friends helping you move, they could drive behind you to let you know if the mattress is slipping. Alternatively, friends could ride along with you, and hold the mattress on the roof through the open windows. This provides some much-needed security if you have to take the freeways.

Conclusion

Moving a mattress can be a big problem. However, it doesn’t have to be. If you follow the tips in this blog post, you’ll find at least this part of your move is much less stressful, and you won’t have to worry about ripping your mattress or causing highway accidents.

If this process still sounds difficult, then it’s time to call in the professionals! Call Olympia Moving & Storage at 800-222-4744 or request an estimate online.

Tips for Moving Large Furniture

Let’s face it. Moving is a hassle. Between the time it takes to pack and unpack your belongings, as well as the costs associated with moving, moving-related stress is certainly real. The experts at Olympia Moving are here to help reduce as much moving-related stress as possible. When it comes to moving furniture, follow these steps to help protect your expensive belongings.

Gather Your Packing Supplies

Much like the French invented the cooking technique “mise en place”, or having all your ingredients ready to go prior to cooking, you’ll want to make sure you do the same when it comes to moving. That means gathering all your boxes, blankets, and bubble wrap prior to getting started. You can buy these from your local moving company, The Home Depot, or U-Haul.

Clean your Furniture

Dust and other grime can damage your furniture during the moving process. Taking the time to clean your furniture prior to moving will prevent this from happening and stop you from bringing in unwanted debris into your new home. Take the time to thoroughly clean your items.

Take apart your Furniture

Any furniture that can be broken down into smaller pieces, take the time to do so. Items such as dining room tables are a great example. Take off the legs and the leaf to save space in the moving truck and minimize breakage. This is also make carrying the furniture easier. Put the screws and parts for the furniture in plastic baggies and tape it to the bottom of the piece prior to wrapping.

Wrap The Furniture

The key to staying warm in the winter is layers. The key to protecting your furniture while moving is also layers. For most pieces of furniture, you’ll want at least one layer of protection. Wrap furniture in a heavy moving blanket to prevent scratches while moving. We also recommend a second layer of plastic wrap to help secure the blanket and prevent dirt in transit.

Looking for professionals to handle moving your furniture? Contact the pros at Olympia Moving for a free quote today!

Tips for Packing a Garage for Moving

When moving, your garage is likely one of the trickiest rooms to pack, even if it isn’t a catch-all space in your home. There are many sharp, hazardous, oddly-sized, and heavy things that need to be packed. There are lawn care tools that need to be emptied and stowed, chemicals that need to be disposed of, and many other things you might consider until you’re half-packed and find something that you’re unsure how to handle.

In this blog post, we attempt to demystify the art of packing a garage. We will give you all the ins, outs, and safety tips you need, allowing you to pack this important room of the house safely and effectively.

1. Dispose of Hazardous Chemicals

Many garages hold hazardous chemicals. It’s important to dispose of these before you move. We know how tempting it is to think that you can avoid buying more gas for your lawn mower if you take the gas can full of fuel that you already have. However, not only is this is a bad idea, but moving trucks do not allow flammable and hazardous items on board. Not only is gasoline flammable, but it will damage everything else in the moving truck if the can tips. Also, make sure to dispose of all pesticides, herbicides and anything else hazardous.

2. Box Up Your Small Tools

Power tools and hand tools should be packed into small moving boxes. It can be tempting to pack them all into one large moving box. However, if you do this, you will regret it the instant you try to pick up the box.

Tools weigh a lot more than people sometimes realize. If you do manage to get the box off the ground, the bottom is likely to give way, spilling your tools on the floor. Then you’ll just have to pack them again, and who wants to do that?

If you have a lot of small hand tools like screwdrivers, it’s okay to leave them inside the toolbox. Just remember to pad the inside with a lot of crumpled packing paper or other cushioning materials or the excess motion can cause your toolbox to tip over.

If you’re packing power tools, it’s important to put them back in the cases they came in. Then you can load them into a small moving box.

If you don’t have the cases for the power tools, then you can simply wrap the sharp pointy ends in a lot of crumpled paper and secure them well with packing tape. You don’t want any sharp edges poking out for people to get injured on.

3. Box Up Your Medium Tools

Things like hedge trimmers and garden trimmers can also be loaded into small moving boxes. Once again, remember to pad the sharp ends in packing paper and tape it all up securely.

4. Pack Long Tools Like a Burrito

For things such as rakes, scythes and brooms, pack them into a big bundle. Wrap a moving pad around them like a burrito. Make sure to tuck in the ends so that the sharp points are safely out of the way and then tape it securely shut on all sides.

5. Packing the Lawn Mower

First, drain all gasoline and liquids out of the lawn mower. Dispose of these properly.

There’s really no point in boxing up the lawn mower. It’s so big and oddly shaped that it won’t fit. However, you do need to wrap packing paper or a piece of cardboard around each of the spark plugs. They will break, and that’s something you don’t want. After you’ve done, simply secure the lawn mower inside the moving truck with tie-down straps. That will stop it from sliding around and damaging other belongings.

6. Stow The Grill

Dump out any charcoal, ash and other refuse inside your grill. Then give it a good spray down with a garden hose. Once dry, secure it inside the truck. If your grill is gas, remember to dispose of the propane. If you have to take the propane tank with you, you’ll need to do it in your own vehicle. It cannot be transported in a moving truck.

7. Take Breaks

Packing up a garage is dirty work. Remember to take frequent breaks and remain hydrated. This ensures that you won’t burn out and throw in the towel.

Packing your garage for moving is a very detail-oriented process. However, it doesn’t have to be a hard, painful experience. If you follow the tips above, your garage will be safely packed in no time. Alternatively, hire the Olympia crew to pack for you. Contact us at 800.222.4744 or fill out our form to request a moving estimate.

Top Reasons To Move To Boston

Boston….. it’s where it all started for Olympia Moving. The area, from downtown Boston to the amazing suburb towns has a special place in our heart. Whether you are a young professional right out of college, or a retired couple looking to enjoy your golden years downtown, Boston has so much to offer as your new home.

Here are some top reasons in our opinion that makes Boston such a great place to live:

Great Public Transportation/Walkability: Whether you live in the direct Greater Boston Area or a suburb, Boston has some of the best public transportation in the United States. You can get so into Boston without a car so easily, and once you get into the city it’s one of the better walking cities. So many people that live in Boston walk or take a quick train ride to work.

Four Seasons: Some people love it and others don’t, but Boston & New England has some of the most beautiful seasons. From 80 degrees in the summer to blizzards in the winter, to crisp and vibrant falls, it’s a unique and wonderful place.

Seafood/Dining: If you live in Boston & along the Atlantic Ocean it is hard to truly know what you’ve got but seafood this fresh is a rare commodity for much of the United States. From the North End to the Seaport area, you’ll have amazing views/restaurants and fresh seafood at your disposal 365 days a year.  

Sports Culture: If you’re a sports fan, some argue there is no better place to live in the world. A town that has a rich tradition of excellence, mixed with passionate fans makes following and watching sports that much more fun.

Career Opportunities: The Massachusetts employment rate has been ahead of the National curve with the professional, scientific, and technical sectors booming. You’ll have all the opportunities to grow your career aspirations in Boston.

Education: Whether you plan on going back to school or you have children, Boston has 35 universities, colleges and Communities College. Some of the highlighted schools in the area include Harvard University, Boston University, Northeastern University, Boston College, Tufts University, MIT and University of Massachusetts Boston.

Things To Do: In Boston you’ll have a never-ending supply of musicians, comedians, tours, nightlife, local bars, local events, concerts, sporting events, parades, fairs, food festivals, and MORE!

History: You lose so much history in many of the larger cities in America. In Boston, there is a historical marker at almost every turn. The blend of a high-end/modern city and the history of where it came from is splendid. From the cobble stone streets to the US Constitution, there is so much to explore.

Tips to Staging Your Home Before Listing

Listing your home can be a daunting task, but staging it can help it sell faster. Olympia Moving & Storage has some tips for staging your home to increase the chance of a sale.

Getting ready to list your home is a big, life-changing decision. You’re planning on relocating, whether it is down the street or in a different state, and you probably want to get the responsibility of your current home off your hands as quickly as possible. Staging your home before you list will sell your home faster and for a better price. Here are a few tips to get started:

A coat of paint can transform your home. Now is not the time to try funky new shades for walls around your house. That fire engine red wall may fit your personality, but it might not fit the next owner’s idea of home. Stick to neutral shades that leave possibilities open in prospective buyer’s eyes. A fresh coat of light paint can give your home a more open appearance and make the room appear larger. Because a room can never have enough lamps, adding light will also make the room look brighter.

Your home should be decluttered so prospective buyers can visualize themselves in the home. Store your personal belongings such as family photos, knick knacks, and your more quirky belongings. Take this opportunity to declutter and reorganize your home and donate or throw out things you no longer want or need. Make sure every belonging appears to have its place, whether in storage or stored neatly in a closet or dresser.  Move excess furniture out of rooms that appear overcrowded. This may be daunting but is a key step to getting your house sold.

No extra space in your garage or basement to store your staging declutter? Use Olympia Moving & Storage’s Declutter Promotion to hire Olympia’s crew to move out the clutter and store FREE for up to three months! Click here to learn more.

Keep your home perfectly clean at all times in case you have a showing on short notice. This may be simple, but doing a deep clean or hiring a cleaning service before you list can make an old home look like new. Get carpets professionally cleaned and floors shined. Scrub bathrooms and counters to make them look their best. Power wash porches and siding. Don’t forget to make your house smell great too! Buy plug-in air fresheners and hide away stinky litter boxes.

Do you have a room you use as a general room? Stage is as though it has a specific purpose. A room that looks like it’s used for several things, such as a den that’s also a dining room with an office in the corner, could confuse potential buyers and deter them from moving forward with your house. Instead of seeing possibility in the all-purpose room, they could just see a mess.

Don’t forget the exterior! Buying some potted flowers for the porch, hiring a lawn care service, and staging some outdoor furniture will make buyers want your home before they even step inside.

Overwhelmed by the prospect of staging, or need more updated furniture to make your home look its best?  Ask your Realtor to recommend a professional stager to take care of the process for you.

If you are looking for a quote for storing your belongings before you move, you can contact Olympia Moving & Storage at 800-222-4744. We offer a variety of storage spaces for rent, and will help you pack your home when it comes time to move. Just starting to plan your move?  Request an estimate online.

Conserving Energy in Your New Home This Summer

Summer months see a rise in electric and cooling costs. Olympia Moving has some tips on how to set up your new home to keep costs down after your big move.


Moving is a process. You’re uprooting your life from one place to another and unpacking takes up time. Something that may be pushed to the back of your mind is your new energy bill. We have some tips on how you can save money this summer while you enjoy your new home!

Unplug things you aren’t using. Are you keeping your laptop or phone chargers plugged in when you’re not home? What about your toaster or coffee maker? All of these are contributors to your electric bill. Unplug electronics when you are done using them, and use a power strip to be able to efficiently unplug whatever is not in use. Unplugging your computer alone could save you around $75 per year.

Placement is key. Lights and televisions radiate a certain amount of heat, which can affect the reading on your thermostat or air conditioner. Your air conditioner will run longer and take longer for your home to heat up to your desired temperature. Place these heat-emitting electronics away from thermostats and anything gauging a temperature reading to evenly distribute heat and cooling.


Switch out your light bulbs. Compact fluorescent light bulbs (CFLS) use less energy than incandescent bulbs and are made to last up to twelve times longer than regular bulbs. The upfront cost will pay itself off quickly when you take into consideration the length of time between replacement.
You should also ask yourself about the temperature you need to feel comfortable in your home. Running your air conditioner at a higher temperature saves up to 18% on electricity costs over the summer. Higher settings require less power to run and having a ceiling or floor fan to circulate air will help keep your home cool. Just remember to turn both off when you leave to save money; fans cool people more than they cool rooms.


Consider adding solar panels. If you just moved into your dream home for the long haul, consider going the extra step to save on your energy bills and help the planet.  Get a consultation for adding solar panels to your home. Solar Power Authority and this guide from Forbes are good resources for getting started.


Still looking for your new home? Request a moving estimate from Olympia Moving & Storage online or give us a call at 800-222-4744

Tips For Labeling Moving Boxes

During a move, the easiest way to keep track of your things is by labeling moving boxes. Olympia Moving & Storage has some tips on the most efficient ways to label.

Moving can be an exciting time. You’ve found a new home, a place to make new memories. Then comes the draining part: packing and labeling all of your boxes. Whether you purchased boxes online or from a moving company, your boxes will need some type of labeling system for transport between residences. How are you going to tell which box has your first night supplies and which box has your high school yearbooks? We have some tips for labeling your boxes so you can find your belongings easily during the move process.

To begin, you will need a pack of at least five permanent markers, preferably in different colors; clear and colored tape; and labels. The markers should be permanent and waterproof, if you can find them. Weather is unpredictable, and you don’t want your label to become illegible due to rain or normal wear and tear.  

You will want labels on at least two adjacent sides of the box, and one on top. It’s going to be easier to unpack or store boxes if you can see what is in it from at least one angle.

Use the same color for all boxes going to the same room, such as red for kitchen or brown for living room. Write the main things on each label, such as books, power cords or place settings. If you have colored tape to correspond with the markers, use the tape as an additional way to easily identify the box’s room by taping the corners of your box. Use clear tape over the labels to add another means of security to the marker. The clear tape will prevent water from getting on the label and block rips and tears. A great resource is to download Olympia’s free printable moving box labels which are color-coded and labeled by room and include an area to write a short inventory.

If you are packing a box of fragile items, make sure it is labeled “FRAGILE” on each side in marker or a fragile label sticker, with THIS END UP written near the top of the box.

You should also make sure to pack and label a First Night box filled with the essentials you will need right away.  Read our blog post for a checklist of items to put in this box.

Another great tip is to use a numbering system to easily find items and identify that all your boxes have been delivered safely.  Write a large number on your boxes or packing labels, then create a chart with each box number, the room it belongs in, and a brief description of its contents.  

Finally, make delivery smoother for your movers by taping a label next to bedroom doors and other rooms that might be easily confused.  You may know which bedroom is little Sally’s and which room is the library vs. the family room, but the movers won’t. Use the same colored marker, tape, or label on the sign as on the box to make it easily identifiable as well.

If you need help packing and labeling your belongings, Olympia Moving & Storage offers several packing plans from full or partial home to fragile items. You may reach Olympia at 800-222-4744 or request an estimate online.

How to Recycle or Repurpose Your Moving Boxes

After moving and settling into your new home, there are always going to be those empty cardboard boxes left over. Olympia Moving & Storage has some ideas for how you can reuse or recycle these used boxes.

So you’ve finally moved and began the process of unpacking your life in your new home. Soon everything is going to have its place in your new space, but what to do with the moving boxes you painstakingly collected for weeks or even months? Inexpensive boxes can be hard to come by, but you probably won’t want to keep them after your move. The most eco-friendly way to dispose of your boxes is to reuse or recycle them.

Give boxes to a friend. Do you have a friend or relative that’s close and moving soon? Save them time and money and gift any boxes that are up to another move. The boxes will be out of your home and you’ll save your friend the hassle of finding their own boxes.

Use boxes for storage. You’ll still need storage in your new home. You can continue to use moving boxes as storage in closets and basements, or even on shelves or in corners with some redecorating. You can use fabric or colored paper to make the boxes more aesthetically pleasing.  Yes – really!  Check out this DIY.

Sell boxes. If you want to try to profit off your materials, you can try selling moving boxes and other packing materials on a variety of websites. Just keep in mind that this could be more of a headache than it’s worth: demand could be low, and people may be unwilling to pay even a small amount of money for used boxes. Some good sites for selling used boxes include:

Recycle your packing materials. Any boxes that have been damaged in the moving process will ultimately need to be recycled. If you visit your town’s website, there should be a link about how your town handles recycling, and what can and cannot be recycled. You will need to break down the boxes before recycling them, in order to make them easier to transport. Oftentimes, they can be left in your regular recycling bin on pickup days. If you live in an apartment complex, you may have a specific cardboard recycling bin. You should contact your local recycling service to be sure of the specific requirements for your area.

Schedule a debris pickup.  If all else fails, an easy solution is to schedule a debris pickup with your moving company.  Many moving companies will come by your home to pick up the used boxes for recycling for a small fee.

To order moving boxes or to schedule a debris pickup, you can contact Olympia Moving & Storage at 800-222-4744. Just starting to plan your move?  Request an estimate online.

Creating the Most Successful Yard Sale Possible

If you plan on moving you will be going through every last item that has been put away in your house for years. Whether you are downsizing and need to get rid of stuff or just realized how much extra “crap” you have lying around, a yard sale is a great way to declutter your belongings while also making a couple extra dollars. To ensure you have a successful yard sale you do need to plan a little ahead of time. Follow these tips to make sure your yard sale is a home run!

Preparing For The Yard Sale

Pick a Date: Your first step is to decide which day you want to hold your event. If you plan ahead of time you can even pick the best season to hold your yard sale. We suggest starting Saturday mornings and during the spring time. The earlier you start, the bigger the crowd you’ll get, as people are usually busier later in the day.

Gather Your Goods: Go through every room in your house and pick out things you don’t want or haven’t used in months. Be sure to even go through closets, attics, basements and garages. Even if you don’t want something, there are plenty of other people that would pay money for it. The worst case scenario is people won’t buy something.

Permits: Many towns now require that you have a permit in order to have a yard sale. If you’re not sure, then double check with the city or town hall to find out if you need one. If you try to have a yard sale without a required permit you can get shut down and fined.

Great printable signs at cul-de-sac cool

Advertising Your Yard Sale

The more people you get to your yard sale, the more you will sell. The better you advertise and people know about it, the more people that will show up.

Make & Place Yard Sale Signs: Most towns have laws prohibiting posting yard sale signs. Checking in with a clerk at your local police station will tell you what you are allowed and not allowed to do. If you are allowed to make signs then make sure they are easy to read from a passing car. Write “Yard Sale” or “Garage Sale” in large letters with your address and an arrow pointing to your house.

Online: The internet has become a critical advertising tool that all yard salers should utilize. People are using websites to look for Yard Sales in your area and you don’t want to miss out. When posting an ad online be sure to include dates, starting time and your address. If the site allows it, then also take some pictures of your hottest items to spark people’s interest. Some places online you can advertise include:

Preparing for the Sale

Cute ways to arrange displays at your yard sale (Via Good Housekeeping)

Now that you have your yard sale date picked out and people are going to stop by, it’s time to prepare for the showing.

Sort Items: In order to give your yard sale some organization and order, try placing similar items together.

Pricing Items: As a general rule of thumb, price items a quarter or third of what they would cost new. There are certainly exceptions to this rule, but at least it gives you a starting point.

Display & Ambiance: Make sure that your yard sale is easily visible from the road as catching people’s attention is crucial. Another tip to catch the eye of people is to place some of your more interesting items towards the end of the driveway. You can lure previously uninterested people if the see a handful of things that would make it worthwhile.

There is surely more that goes into a yard sale but hitting these main points will get your Yard Sale off to a great start.

After the Yard Sale

After your sale there will surely be things left behind. If you can’t give items away to friends and family hold off on throwing everything out.

Check out our blog posts on charities that will pick up furniture donations in Washington D.C. and Boston. You can also check out this furniture disposal directory from Wayfair.

You can also try listing & selling your leftover items on these websites and apps:

Done decluttering and ready to get moving? Contact us for a free moving estimate from Boston, Washington DC, and Philadelphia.