Preparing to Move Checklist

Preparing to move house may feel like an overwhelming chore, but if you approach it in a focused, organized way it can be a lot easier than you think.  You may not relish the thought of moving out but if you take these tips on board you’ll see how, with the proper planning and organization, you might even enjoy the process. After all, the door to your new house is waiting to be opened and that’s a cause for celebration.

This blog was written by Angela Pearse, a blogger for Zumper.com.

1. Should You Hire Movers or Move Yourself?

Olympia Moving Crew 11

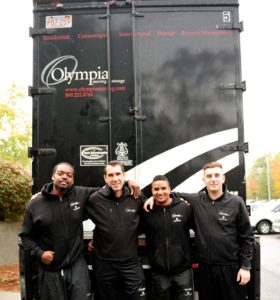
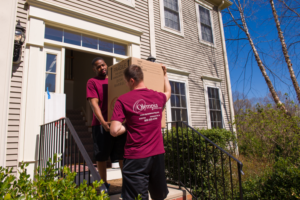
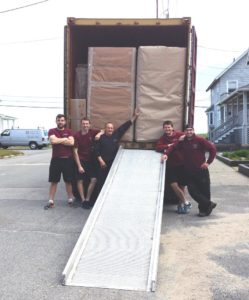
If you’re looking for a simple solution for your moving woes, then it’s always worth hiring professional movers. Rather than getting frazzled about how you’re going to get your possessions from A to B, let the experts take care of it. Book them in, then all you have to worry about is getting your stuff packed up. Preparing to move is stressful enough, let the professionals deal with the rest.

2. Create a moving checklist

The reason people get stressed about moving is because they leave everything until the last minute and then there’s a mad rush to pack everything up. Start at least a month ahead of moving day and create a moving checklist of all the tasks that need to be done. Ticking off completed tasks week by week will make you feel in control and on top of your packing before the truck arrives. Follow this 9-week checklist for a smooth relocation.

3. Set-up a moving budget

Money, or lack of it, is also a common stress factor when moving out, so do up a list of all the costs involved in the move so you can make sure you have enough cash. Add things like the cost of the movers, packing boxes & tape, utility connection fees and the like. If you have a cat or dog will you need to house them in a kennel or cattery while the move takes place? Add this cost to your moving budget.

4. Transferring Your Information

You’ll need to notify your utility companies about your change of address well in advance so they have time to make the transfers. Not having power or gas when you first move in to a new house can make for a miserable few days while it gets sorted. Don’t forget to notify your employer, doctor, dentist and any other service providers you use, plus your family and friends, of your new address.

5. Measure the new place

While preparing to move, it’s easy to make assumptions that all your furniture will fit perfectly into a new house but sometimes this isn’t the case. It may not be practical to visit your new home to measure up spaces if it’s in another state, but if it’s local then it’s a good idea to do this. If your current furniture doesn’t fit you may need to sell what you have online and order new furniture, but knowing in advance will make things less stressful.

6. Sort through your stuff

You can eliminate two stress factors, lack of money and too much stuff, by sorting through your possessions and decluttering your house before you start packing. Paring down the amount of stuff you have when you’re preparing to move will make it easier to pack, and the less stuff you have, the less it will cost you to move it.

 7. Make hard decisions

Deciding what to keep and what to toss is a lot easier if you apply some rules to the proceedings, and make two piles ‘keep’ and ‘don’t keep’. For instance, to keep it you have to have worn it or used it once in the past year. A pile of tops you’ve worn once in the last five years will go in the ‘don’t keep’ pile, likewise so will a hand-me-down cake mixer from your sister you’ve never used.

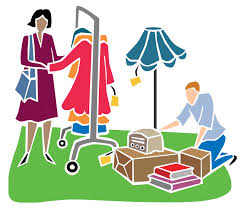
 8. What to do with stuff you’re not keeping

Now that you’ve sorted through all your stuff and have items that you haven’t used or are unlikely to use and that are still in good shape, why not consider selling them online, donating them to charity, hosting a garage sale or recycling them? Selling what you can online will top up the amount you have in your moving budget, and donating to charity will make you feel good.

 9. Gather moving supplies

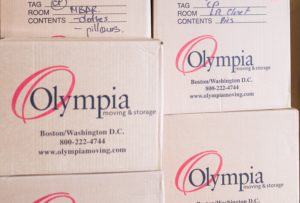
Now you’ve decluttered it’s time to start packing, but you’ll need moving supplies to do so. This includes packing boxes, bubble wrap, newspaper, packing tape, sticky labels and a marker pen. You could beg steal or borrow from friends but a much easier solution is simply to order what you need online.

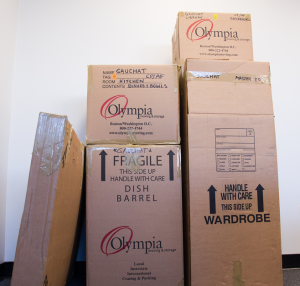
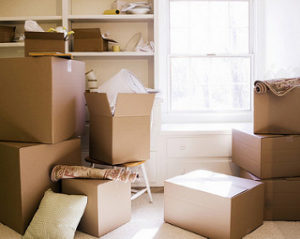
 10. Pack and label boxes

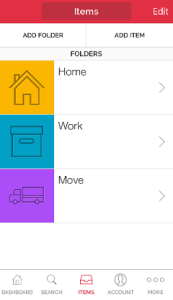
Pack the items in each room, apart from the furniture, into boxes and label the boxes as you go. You may want to keep an itemized online spreadsheet for each box so you know what’s in it, and also for insurance purposes if anything goes missing.

Here are some takeaway tips to keep in mind to ensure you have a positive and rewarding moving experience.

  • Plan ahead and get organized early on
  • Clear out the clutter first
  • Sell or donate what you can
  • Ask for help from friends and family
  • Take time to say goodbye
  • Eat well and get enough sleep
  • Try to go with the flow

If you are ready to start the moving process, call for a free moving estimate at 800-222-4744 or request an estimate online.

Guide To Moving a Washer and Dryer

Moving a washer and dryer is a complicated process, and we often overlook specifics. Before you sell your home, decide whether you will be moving your appliances and make a plan. Often, sellers will decide to lump these large appliances into their closing instead. If you’re bringing your washer and dryer from your old house to your new home, follow these tips to safely and correctly prepare for moving a washer and dryer. Also keep in mind when moving a washer, it is an extremely heavy appliance and requires multiple people. However, depending on how accessible the appliance is, moving a dryer is much simpler as it weighs much less.

Steps to prepare moving a washing machine

Make sure you clean and safely pack your washer. Upack.com has great step-by-step instructions.  The most important detail is following the owner’s manual to secure the drum in place. It is very important to keep the drum stable, or else it will get destroyed on the moving truck. If the drum becomes compromised, your washer is as good as useless until you pay for an expensive repair. If you do not want to handle the drum yourself, a professional moving company can arrange this service for you.

To finish preparing the unit, safely disconnect the power and water. The water tubes may still have water in them, so be mindful for spills.  Place all the tubes inside the washer so they do not get lost. Duct tape the door shut as well as any openings or areas that need to be secured. Protect the unit by wrapping it with moving blankets or paper padding and strapping everything in place. Again, ask your moving company in advance if you need assistance with this process.

moving a washer and dryer

Steps to prepare moving a dryer

When moving a dryer, disconnect the power and gas if applicable, and disconnect the vent pipe. Secure all the cords to the dryer by wrapping the unit in shrink wrap.  If you are moving a dryer that is electric, it’s easy enough to unplug it from the wall, disconnect the vent and wrap and secure it to the body of the dryer.  If you have a gas dryer, you will need to contact a licensed plumber or work through your moving company as it can be extremely dangerous. In that case, ask your mover to plan this service for you. For step by step directions from Dolly.com, check out How to (Safely) Move a Washer and Dryer.

Other considerations for moving appliances

When planning,  consider the locations where you will be moving the washer/dryer in your new home. Will you have you lift it up or down a flight of stairs? Are you able to lift the machine? If there are doubts in your mind about being physically able to move them, you may want to enlist help from professions: moving a  washer and dryer is no small task.

At Olympia, we can manage this for you. If you’d like to avoid the added stress of prepping your washer and dryer unit, let your Olympia Move Coordinator know you will need help with these specialty items.

If you need to help moving a washer and dryer and/or the rest of your home, request a free moving estimate.


Moving In Together: Combining Two Spaces Into One

Moving In Together

So you and your partner are moving in together, but now have the tough task of combining your two differently-styled places into one new shared space. How do you do this, and what do you do with your extra stuff?

Prepare!

You each have things you don’t use, clothing you don’t wear, and old broken furniture you forgot was in the closet. Go through everything and decide whether or not you need it. Will it get used in your new life together? If not, make the break and get rid of it. Whether it is clothing or dining room chairs, decide what you will keep, toss, donate, or sell. Remember that selling prolongs the time it will take to finish going through everything. If you want to sell most of the items you’re getting rid of, make a deadline of when they have to sell by. If it doesn’t sell by then, donate it! The more you keep, the more you have to both pack and move.

See our tips for moving your bed and larger furniture items.


Decide On A Style For Your New Place

By deciding together what you want your new space to look like, you can identify some easy packing guidelines. If an item fits the vibe you decided on, it can be packed up. If not, it’s an easy way to put it aside to donate, sell, or get rid of.
Choosing between a modern, sleek, or cozy look might be challenging. If you can’t decide on one overarching theme, decide on different looks for each room, or decide which of your items go best with those of your partner.


Mixing Styles When You Move In

Each of you will have different tastes in what looks good, different opinions on throw pillows, and a different idea on how to mix patterns. Try your best to mix and match your things with theirs, but if compromise is not in the near future, consider buying something new together. If you’re interested in unique and high quality home furnishings, Arhaus is a great place to start for stylish pieces, which have the added benefit of being made from recycled natural materials. New furniture is a huge investment, so be sure to do your research to find pieces that will last a long time and also appeal to both of your design tastes. Check out the Arhaus Instagram Page for some inspiration for designing your new home. Moving in together is a big step that will come with it’s own conflicts, so don’t spend too much time arguing over whose lamp works best in the living room. If buying new things will minimize conflict, try to shop together instead.

Dealing With Duplicates

Now that you’ve gotten rid of all the things you won’t need in your new place, you both need to decide which bed you’re going to keep and which TV is best.

First, each pick a small amount of things that you can’t live without and bring those to the new place, no questions asked.  Make compromises about whose furniture will be kept and who will get rid of what. Look at your furniture logically- have you had the same, ratty, hand-me-down couch since college? Is it worth moving that rickety dining room table? Make choices with the future in mind, and choose to keep the item that will last longer and serve you better. Decide what combination of couches, beds, coffee tables and chairs best fit the space you’re moving into. Keep the better quality kitchen appliances, plates, silverware, and glasses.

If you and your partner have similar interests, you’ll also most likely end up with two sets of the same books, movies, games, and sports equipment.
· If you have two sets of the same book series, keep the more valuable one. If you don’t read them or use them anymore, throw your old, dusty books away or bring them to your local used book store.
· If Netflix has become your primary source of on-screen entertainment, throw away the DVDs you haven’t watched in years.
· If your Monopoly set is missing pieces, or you don’t have all the letters to your box of scrabble, toss it. If you both have the same game, make sure you have one full set between the two of you, and keep the best looking board.
· Lastly, if both of you have masses of sports equipment or yard games, sort through it all together and only keep what you’ll actually use in your new space. If you still have multiple pairs of soccer cleats from club soccer in college, pick one and toss the rest. If you both have a bucket  of tennis balls, golf balls, or baseballs, trash all the dirty, ripped, or water-logged ones, and cut the amount you have in half.

After The Move

You still might have too much stuff for the space. Decluttering doesn’t stop once you move in, so be ready to continue getting rid of things and needing to buy completely new things. A new space is a big investment, but remember that you’re creating a new space for your new future living with your partner.

Once you’re both ready to move, contact us at  800.222.4744 or fill out our form for a free moving estimate!

Countdown Checklist For Your Pre-Move Garage Sale

When it’s time to move to a new home, that could also mean its time to slim down on what you have in your home before the relocation.  A garage sale is the perfect way to do it & make some money while you’re at it! Here is a countdown checklist on how to execute the perfect garage sale!

One Month Before Garage Sale:

  • Get A Date in Mind. Once you have a target date, it will help you remain organized and work towards your goals for the big day.
  • Trash the Trash! As you begin to go through the things you no longer want, separate in to three piles. “Keep, Throw, Sell”
  • Look in to City Requirements & Regulations. Make sure your town or city does not have any specific restrictions that prohibit posting signs around town.
  • Do a some research. Do a little basic research, pricing on antique items and one of a kind pieces. The things you have could have more value than you expect them to!
  • Ask neighbors and friends for grocery bags. Also start to collect folding tables to display the items on.

Two Weeks Before the Garage Sale:

  • Go through the items in your “keep” pile, make sure you still want to keep them in your possession, if not move them over to the sell.
  • Begin to clean and organize your “sell” items – The better condition they are in, the more money they will be worth!
  • Start thinking about pricing – Buy pricing materials & stickers and start a tentative pricing list for the items.

One Week Before the Garage Sale:

  • Begin to distribute ads around town. Post on local town pages & Facebook. Let your friends and family know.
  • Finalize your pricing. Take the list you made a few weeks prior and begin to label all of your items.
  • Go to the bank. Make sure you have plenty of change, all size bills and coins should be in  your possession for the day of the sale.
  • Watch the weather. If rain looks like it could be a factor maybe make alternative plans
  • Have all your sales materials in order. Bags, change, newspaper wrapping, calculator & pens.

One Day Before the Garage Sale:

  • Make sure you have enough signs around town, the day before is the most important day for advertising!
  • Mark off things around the site of the sale as “Not for Sale” – you don’t want anyone trying to buy you potted plants!
  • Check the weather, again – make sure you are good to go for the next day!

The Day of the Garage Sale!

  • Wake up well before the start time of the sale to get everything arranged outside, put the small valuable things close to you so you can keep any eye on them.
  • Organize your items by category so it is easy for customers to browse your sale
  • Lock your home. When you’re busy selling you don’t want to have to worry about your home. Safety precaution!

The idea of a garage sale can be extremely overwhelming. When you break it down by week it can make the day of worry free! Once you know what you would like to move to your new home. We promise to provide you with exceptional service.

For more yard and garage tips, be sure to check out our other blog: Creating the Most Successful Yard Sale Possible

Done decluttering and ready to start moving? Request a free moving estimate online or give Olympia Moving & Storage a call at 800-222-4744

Tips For Labeling Moving Boxes

During a move, the easiest way to keep track of your things is by labeling moving boxes. Olympia Moving & Storage has some tips on the most efficient ways to label.

Moving can be an exciting time. You’ve found a new home, a place to make new memories. Then comes the draining part: packing and labeling all of your boxes. Whether you purchased boxes online or from a moving company, your boxes will need some type of labeling system for transport between residences. How are you going to tell which box has your first night supplies and which box has your high school yearbooks? We have some tips for labeling your boxes so you can find your belongings easily during the move process.

To begin, you will need a pack of at least five permanent markers, preferably in different colors; clear and colored tape; and labels. The markers should be permanent and waterproof, if you can find them. Weather is unpredictable, and you don’t want your label to become illegible due to rain or normal wear and tear.  

You will want labels on at least two adjacent sides of the box, and one on top. It’s going to be easier to unpack or store boxes if you can see what is in it from at least one angle.

Use the same color for all boxes going to the same room, such as red for kitchen or brown for living room. Write the main things on each label, such as books, power cords or place settings. If you have colored tape to correspond with the markers, use the tape as an additional way to easily identify the box’s room by taping the corners of your box. Use clear tape over the labels to add another means of security to the marker. The clear tape will prevent water from getting on the label and block rips and tears. A great resource is to download Olympia’s free printable moving box labels which are color-coded and labeled by room and include an area to write a short inventory.

If you are packing a box of fragile items, make sure it is labeled “FRAGILE” on each side in marker or a fragile label sticker, with THIS END UP written near the top of the box.

You should also make sure to pack and label a First Night box filled with the essentials you will need right away.  Read our blog post for a checklist of items to put in this box.

Another great tip is to use a numbering system to easily find items and identify that all your boxes have been delivered safely.  Write a large number on your boxes or packing labels, then create a chart with each box number, the room it belongs in, and a brief description of its contents.  

Finally, make delivery smoother for your movers by taping a label next to bedroom doors and other rooms that might be easily confused.  You may know which bedroom is little Sally’s and which room is the library vs. the family room, but the movers won’t. Use the same colored marker, tape, or label on the sign as on the box to make it easily identifiable as well.

If you need help packing and labeling your belongings, Olympia Moving & Storage offers several packing plans from full or partial home to fragile items. You may reach Olympia at 800-222-4744 or request an estimate online.

The First Steps to Organize a Pack to Move

When you start to pack your home it can be overwhelming. It is hard to know where to start. To minimize the chance of losing something the best thing to do is take a step back and plan. The key to success for the steps leading up to move in day is organization. Here are some tips on how to execute a smooth pack from the start.

1. Walk around the house with a pad of paper and pen and make a plan on what rooms you’re going to pack first. The office full of stuff you haven’t touched in a few months could be first, and maybe the kid’s room one of the last. Prior to packing it is essential to have a solid plan.

2. Acquire packing materials before you dive in to packing. Olympia has excellent packing materials available for purchase & delivery. Click here to order.

3. Learn how to pack using Olympia’s “How to Pack” video series. In these videos Olympia’s training manager, John, demonstrates how to pack even the most fragile items to arrive at your new home safely and in one piece. Click here to view them now.

4. Pack one room at a time. While this sounds like an obvious solution, it is crucial for when you move in to your new house. You will have boxes labeled by room and you’ll be able to find things quickly. If you’re really feeling organized keep a running list of what is going inside the boxes and place it on top. Utilize Olympia’s free printable box labels to help keep organized.

5. Pack the most important items separately: When you’re in the process of packing it is hard to gage what you will and will not need. To be safe, make a separate box of all of these things and label it “IMPORTANT” for now put everything you might need in there, from laptop cords, TV cords, remotes, headphones, and passports. If you may need it, put it in there for now. Learn more about packing what you need right away in our blog about the “First Night Box.”

If you don’t want to pack at all, no worries! Ask about a quote for Olympia’s full-packing services by calling 800-222-4744 or request a quote online.

What Not to Pack When Moving

The benefit of working with the moving company is not having to worry about transporting your items. However, from liability, convenience, and peace of mind standpoint, there are several items that you should transport to your new home in your own vehicle. While you’re packing, place these items and boxes in a separate part of your house to ensure the movers don’t load them into the truck by accident. You can even ask your movers to load these items into your own car or vehicle for you.

The essentials for your first night

After a long day of moving, there is nothing worse than opening all your boxes to find your bed sheets, phone charger, and toilet paper. We highly recommend packing a first night box, full of things you will need to during the first few days in your new home. These items might include:

  • Clothes
  • Toiletries
  • Linens
  • Electronics & chargers
  • Keys

Click here to read our blog on the first night box and download and handy checklist to help you pack it.

Hazardous items that are illegal to ship on a moving truck

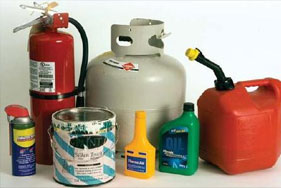
For the safety of your shipment, there are several items that are illegal to move on our moving trucks. These items are flammable or combustible, so they cannot be moved on the truck as a safety precaution to prevent fires. Other items, such as cleaning agents and bleach, are both flammable and if they leak they could potentially ruin your furniture on the shipment. Be sure to discard these items before your move or move them in your own vehicle.

  • Aerosol cans regardless of content
  • Heating agents such as Sterno
  • Nail polish/remover
  • Fire extinguisher
  • Any type of gas in bottles or tanks including propane or oxygen (we can move lawnmowers etc. if the gas tank is empty)
  • Paints, varnishes, solvents, thinners and oils
  • Ammonia, bleach and other household cleaning agents
  • Chlorine granules or powder
  • Muriatic acid (also called hydrochloric acid)
  • Auto batteries
  • Charcoal/lighter fluid
  • Matches and lighters
  • Ammunition
  • Fireworks & flares
  • Fertilizer
  • Any other combustible product

Valuables, medication, and important documents

Although the crew is trustworthy and careful, we recommend transporting your small valuables and irreplaceable items as well as items that contain personal information in your own vehicle. Also remember to pack items that you may need during the course of your move, such as medication, closing documents, and laptops, to take on your own. Items that should not be moved on the truck include:

  • Valuable Jewelry
  • Cash, gift cards, and checkbooks
  • Guns and firearms
  • Valuable furs
  • Hard-to-replace documents such as birth & death certificates, marriage certificates, deeds and other important documents
  • Documents you may need for your closing
  • Laptops or computer hard drives
  • Social security cards
  • Insurance policies
  • Ashes
  • Passports
  • Stocks, bonds, and securities
  • Valuable collections such as wine or stamps or coins
  • Family photos and videos
  • Small heirlooms

Also, don’t forget, any items that are moved on the truck that exceed a value of $5,000 should be noted on a Declaration of Extraordinary Value form.

Perishable items

If you are doing a multi-day or long-distance move, there are many items that should not be moved on the truck because they may be ruined in transit due to temperature changes on the truck. These items include:

  • Frozen/refrigerated food
  • Plants and potted trees
  • Open non-perishable food items
  • Wine (click here for our blog on wine transport alternatives)

Transporting these items on your own will go a long way in preventing issues and ensuring you have a smooth relocation. If  you ever have any questions about what can or cannot be moved, you can ask your relocation coordinator.

You may also be interested in:

Helpful Moving Apps

Moving is tough and apps are convenient so it makes total sense that developers would create a moving app to help you through your relocation. We went ahead and reviewed 3 free moving apps that might help make your relocation easier…in addition to using Olympia Moving & Storage, of course.

anthropoligie platesortly folders

Sortly:

Aesthetically pleasing and easy to use, Sortly is an app that helps you do exactly what it sounds like.. sort your life! The moving app offers folders to narrow down your needs and work from specific lists in order to keep you more organized. Even better, within each folder you can create sub-folders for each room in your house, making it easier to sort and eventually find your belongings.

When adding items to your folders, Sortly gives the option of adding the quantity of items as well as value AND a photo.  So, if you’re worried about keeping track of the condition of your belongings in the case of damage or missing items, you’re all set!

Sortly also includes a great moving checklist with the option to mark tasks as “irrelevant” or “done,” so you can be sure to get all of your prep work done before moving day. Handy!

If you’re feeling fancy, another added bonus of using Sortly is the option to make your own QR labels. If you aren’t the tech-type and this doesn’t appeal to you you can always stick with our free printable labels and still stay organized.

A moving app like Sortly would definitely be helping when planning your move, think estimating the number of boxes you’ll need and putting together an inventory to get a quote, and would be a huge help when unpacking your belongings once you’ve moved into your new home. Learn more about Sortly here.

MoveAdvisor:

MoveAdvisor is different than Sortly, but it’s a great moving app option if you’re looking for moving companies in your area. It’s user friendly and is sort of like playing a Sims game with your belongings.

By clicking and dragging items, you can easily obtain a general idea of the weight of the items you’re looking to move, and everything you need to plan is in the palm of your hand. MoveAdvisor can be found here.

moveadvisor appmymove inventorymove details

My Move:

mymove menu

It seems like the developers of this moving app haven’t quite worked out the bugs. MyMove does ask for your origin zip and destination zip, but the app bases your approximate weight on the type of house you live in but doesn’t take your actual belongings into account, which means you’ll want to give a more detailed idea of your belongings when speaking with moving company.

Unfortunately, the “calculate moving cost” button brings you to a secondary page asking for your origin and destination again but doesn’t allow for destination state selection so this moving app isn’t the most useful if you’re looking for an accurate estimate for moving services.

The MyMove moving app would be most useful if you’re looking for moving checklists and  moving tips.

After checking out these three moving apps, we would suggest trying both Sortly and MoveAdvisor. Each moving app carries their own list of benefits and helpfulness but a mixture of the two could be even better. When planning a move it’s always better to speak to a professional about questions that are specific to your relocation. Moving apps are certainly helpful when organizing, but more information is better to get an accurate idea of your moving costs. Find more resources on MyMove here.

Ready to plan your move? We’re here to help.
Call us at 800.222.4744 today for your free estimate or request an estimate online.

You might also be interested in:

Guide To Moving Wine

moving wine
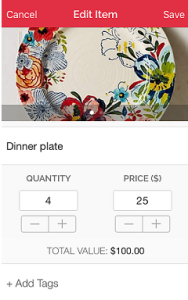
Are you a wine enthusiast preparing for a relocation? Have you considered how to move a wine collection you have been amassing over the years?

Wine bottles are unique items to relocate because they are fragile, often extremely valuable, and the contents are very volatile.

Methods of Moving Wine

Move it Yourself: This is a good option if you have a small, valuable collection. We often tell families to move the items that are most valuable to them in their own cars if possible. This allows you to have complete control and peace of mind. Just be sure to follow our wine packing and moving tips below. You can also opt to have the moving company pack the wine, but move it yourself.

Trust to a Moving Company: This option is better for local moves than for interstate moves. You can include wine in your move along with your other household goods. This probably the best option if your wine collection is not valuable, or if it is the spring or fall seasons, when the temperatures are not extreme. If the moving company is relocating your wine, ask your consultant or coordinator if the company has wine moving experience and their method for packing and moving the wine. Some moving companies may even be able to refrigerate your wine throughout the relocation. If your wine is valuable and you select to have the moving company relocate your collection, be absolutely sure that you fill our a High Value Inventory for your collection.

Hire a Wine Relocation Professional: There are some companies that specialize in only moving wine. This option can be pricey, but it is the best choice if you have a valuable collection and you are moving over a long distance. Your moving company will have a recommendation or can coordinate the service for you. Some wine relocation companies include:

Considerations For Your Transport Decision

When you are trying to choose the best method for your wine relocation, consider the following:

Am I moving local or interstate? For local moves, a better option is moving the wine yourself or with the moving company. For interstate moves, the better option is hiring a specialized company.

How long will your items be on the truck? If your wine is valuable and the move takes multiple days, the more your wine will be exposed to temperature fluctuations. There longer the transport time, the more you should consider moving the wine on your own or with a specialist.

How extensive is your wine collection? A larger collection should be moved with a moving company or wine specialist.

How valuable is your wine collection? If your collection is valuable, you should definitely choose a refrigerated, specialized option.

What is the weather like around you move date? When the temperatures are extreme in the summer and winter, it’s more important to ensure that your collection is in controlled refrigeration during the relocation.

How to Pack Wine Bottles for Moving

Appraise your wine before you move: This is important because if there is any damage to your collection during the relocation, you will have the documentation to obtain the full value in your claim. You can often ask your local wine vendor for a recommendation for an appraiser.

Fill out a high value inventory: If a company is relocating your wine, be sure it is listed on a high value inventory. This will ensure the company keeps a special eye on it, and it will help ensure that you receive the full value in the case of a claim.

Pack wine with care: Purchase specialized wine boxes like this one. Be sure to pack wine on its side to keep the corks wet. Never pack and move an open bottle of wine.

Keep the temperature stable: To maintain the best taste and prevent the bottle from corking, keep the wine around 55 degrees Fahrenheit.

Allow the wine to rest: Due to the movement, do not open your wine for 7 days after the relocation.

Check customs laws: Some states or countries do not allow you to relocate wine across their borders.


Are you ready to move your wine the rest of your belongings?  Call 800.222.4744 for a free moving estimate from Olympia Moving & Storage, or request an estimate online.

Also check out:

Estimating the Number of Boxes For Moving

Estimating number of boxes for movingOur moving consultants are all experts in estimating the weight, volume, and costs for a move, but even they will agree that estimating the number of boxes for moving can be tricky. Truthfully, the number of boxes you need to purchase to start packing is completely variable and unique to every relocation. Some homes are sparse, some families are pack rats, and even the types of boxes needed are unique to what you own.

Therefore, the most accurate way to determine how many boxes you need will always be to have a professional moving consultant do an in-home survey and produce a cube sheet. The cube sheet will include the number and types of boxes you will need to start packing, and that list will be completely customized to your items.

However, sometimes you just need a rule of thumb to purchase boxes and start packing. Here are some averages and generalizations we use for estimating the number of boxes needed for a move:

Before you get started, click here to learn more about the types of boxes sold for packing for a move.


Average number of boxes needed to pack an apartment or condo:

ROOM 1.5 cu. ft. small box 3.1 cu. ft. medium box 4.5 cu. ft. large box 5.1 cu. ft. dishpack box Wardrobe Boxes
Kitchen 2 5 4 4 0
Living Room 2 3 2 1 0
Dining Room 0 1 0 2 0
Master Bedroom 1 5 5 0 4
Bedroom #2 1 3 3 0 2
Bathroom 2 0 2 0 0
TOTAL 8 17 16 7 6

How many boxes to move a one bedroom apartment? Approximately 45 boxes. About 54 boxes are required for a two bedroom apartment.

Average number of boxes needed for a single family home move:

ROOM 1.5 cu. ft. small box 3.1 cu. ft. medium box 4.5 cu. ft. large box 5.1 cu. ft. dishpack box Wardrobe Boxes
Kitchen 4 6 4 6 0
Living Room 4 4 4 2 0
Dining Room 0 2 0 4 0
Master Bedroom 3 6 8 0 6
Bedroom #2 2 5 5 0 2
Bedroom #3 2 5 5 0 2
Bathroom #1 2 0 2 0 0
Bathroom #2 2 0 0 0 0
TOTAL 19 28
28 12 10

How many boxes to move a house? Approximately 100, depending on the number of bedrooms, and of course the volume of belongings.

These estimates only take into account an average home set-up.  Think about which things you tend to have more of than the average household, then add boxes based on that.

  • Don’t forget about adding boxes to pack hall closets, basements, attics, garages, and sheds.
  • If you have many books, papers, or records, add more 1.5 boxes.
  • For more knick-knacks, small appliances, and miscellaneous, add more 3.1 boxes.
  • For more clothes, blankets, pillows, and stuffed animals, add 4.5 boxes.
  • For additional kitchenware, add 5.1 boxes.

Paper and Tape

  • Tape: purchase 1 roll of tapes for every 10 boxes
  • Packing Paper: purchase 25 lbs of packing paper for every 2 dishpack boxes, this is enough to cover those dishpacks and additional fragiles in the other boxes

Other tips and rules of thumb for estimating boxes:

  • Don’t forget your mirrors and artwork!  Add 1 mirror carton for every 2 large frames in your home.
  • Do you have bookcases?  Add 6 additional 1.5 boxes for every bookcase in your home.
  • For closets with hanging clothes, a wardrobe box will hold 2 feet worth of hanging items, so just measure the width of your closet to determine how many wardrobe boxes you need.
  • Moving.com has a handy packing materials calculator that is also a good guideline for estimating boxes.

Ready to purchase boxes? If you’re packing for a Boston, Washington D.C., Austin, or Philadelphia move you can request a free box delivery by filling out this form.

Need more packing help? Be sure to check out:
Packing Resource Center
Free Printable Moving Box Labels
9 Items You Shouldn’t Bring When Moving