Pre- and Post-Move Cleaning Checklist
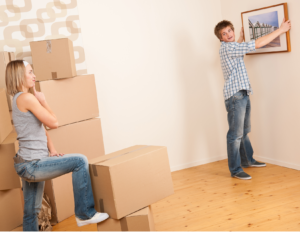
Moving a house can be a challenging experience. You have to adequately plan it for everything to happen as per your schedule. When you are planning to move there are many things that you have to do and one of them is cleaning. The idea of cleaning can be daunting to many but if it is done on time it will help you reduce unnecessary baggage when moving. When you clean your current house, you will ensure that the house is in good condition and your deposit will be guaranteed. No matter how tired you are you should try to clean it so that your moving process will be easy. In addition, before you move, clean the house you are moving into. This way you will not be worried about any germs or dirt once you have settled. Besides, you will not have time to clean once your boxes are delivered.
Moving out cleaning tips
For the cleaning to be effective it is critical that you have cleaning supplies at hand. There are certain cleaning supplies that you cannot do without when moving your house. Some of these include white vinegar, glass cleaners, disinfecting cleaners, dusting cloths, cleaning cloths, nylon-bristled scrubbers, and different kinds of brushes. It is vital that you should not load these items on your moving truck because you want to clean your current house quickly and move. It is recommended that you clean the house by task and not by room this way you will handle your takes as fast you can. You will need to follow the checklist below to help you during the moving process.
Move Out Cleaning Checklist
Now that you have the basics on what cleaning should involve before and after the move the next aspect is to do a checklist that will guide you to do the cleaning effectively.
Kitchen
Empty all your drawers and cabinets out then wipe them clean with a mild cleaner and soft sponge. Do not forget to remove your liners and replace them with new ones, once they have dried completely. Clean countertops with warm soapy water and disinfect them to reduce bacterial and mold growth. Use specialized glass cleaner to make all the glass elements in your kitchen to shine. Scrub your sinks and faucets with appropriate cleaning products use chlorine-free bleach to make them shine. Drop lemon slices to remove any odors. Empty and clean the refrigerator by removing the drawers and shelves and wipe with the right appliance inside with soapy water. Remove the grills from the oven and racks and scrub them clean with soapy water. You can use steel wool to scrub and pay attention to the oven glass door. Remove all the grease and grime from the entire stove surface. For the dishwasher, shake baking soda and damp sponge and wipe down all the surfaces. Add a small amount of bleach to remove any bacteria. Finish the cleaning by sweeping and mopping the kitchen floor.
Bathrooms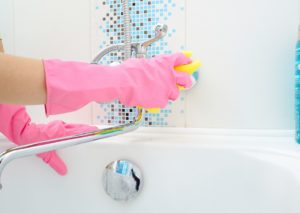
Tiles
Scrub the tiles and grout with a cleaner that contains bleach and rinse them well.
Tub and shower
Clean the tub, shower road, tub fixtures, shower head, and the shower enclose and ensure that all the soap scum is removed. Use adequate disinfectant to rinse all the surfaces well this will ensure that there is no bacteria build-up.
Sinks
Scour the sink and pay attention to the handles, faucets and chromed surfaces. Use an old toothbrush to get to areas that are hard to reach with a normal brush.
Countertops and vanities
Remove all the items and clean them with soapy water and a damp cloth.
Toilet
Sanitize the toilet tank, bowl, and seat and wipe the roll holder.
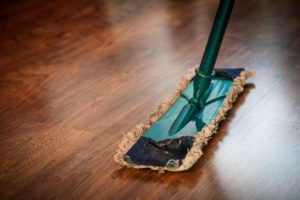
Clean the bathroom floor well.
Bedrooms and living room
Clean the window frames, sills, casings, tracks, blinds and glass panels. Clean all the flying screens inside and outside. Wash the curtains and wipe down air conditioners.
Empty wardrobes and polish the surfaces if possible. For any fabric or leather apply a protector to keep them clean and shiny. Wash the rugs and clean them well.
Outside area
It is not applicable if you are living in an apartment. However, if you have one clean all the storage areas and shed floor. remove all your possessions from your yard and eliminate dust and cobwebs from window sills and evens. Ensure the outdoor lighting is clean and in working condition.
Moving in cleaning checklist
Apart from following the cleaning tips for the move out you should also follow the cleaning tips and embrace the checklist when moving into your new home. You can use the tips that we have indicated previously. However, this will depend on what you have in the area.
Deep clean the house before your items are delivered
It is important to note that you will not have to clean once your items arrive at your new destination. Cleaning them before you move helps a lot because once they are delivered you will be maintaining the cleanliness. You should take some time to clean the house that you are moving into because once you have all the items delivered with boxes crowding over you will not have a chance to do a deep cleaning.
 Kitchen
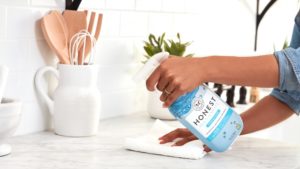
Cabinets, drawers, and counters
Wipe down all the drawers, countertops, and cabinets with disinfectant spray. Add a lining to the cabinets, countertops, drawers once they are disinfected and allow it to dry.
Fridge and stovetop
Remove all the top parts of the drawers, fridge shelves and clean them before moving into cleaning the fridge itself. Soak them in a tub filled with warm soapy water. After some time dry the parts once you have wiped all the surfaces of the fridge and stovetop. After cleaning to prevent any odors place a tray of fresh or used coffee grounds at the back.
Dishwasher
Pour a cup of white vinegar on a dishwasher container and place it on top of the rack of the washer. Run the washer for one cycle and you should have a clean washer.
Bathroom
Toilets
Replace all the toilet seats and covers. This is an inexpensive way to ensure that you have a fresh and clean start. Wipe down every surface including the medicine cabinets with disinfectant spray.
General
Once you have settled sage your home, this will give it a new start and clear any negative energy that may be lingering in space. Place the sage in a clay bowl or any other heatproof surface and light a match. Give the sage a few minutes to build some nice smoke before you begin to clean the house.
Take pictures
Before you unpack take some time to take pictures or videos of the entire home. This will help you track the cleanliness and how you can arrange your items.
Cleaning a home is very important when moving out and moving in. Everyone wants to feel at home in a new house and cleanliness is a big part of that. whether moving locally, out of state or international be sure you book the right moving company to help make the process as smooth as possible. Click here for a free estimate today.

 Moving Your Art And Paintings